Configuring Backblaze B2
Save your screenshots, PDFs and other renders to a Backblaze B2 bucket from Urlbox
This guide will walkthough the process of configuring Backblaze B2 so that you can store screenshots and other renders directly to your Backblaze B2 public or private bucket.
Create Backblaze B2 Public Bucket
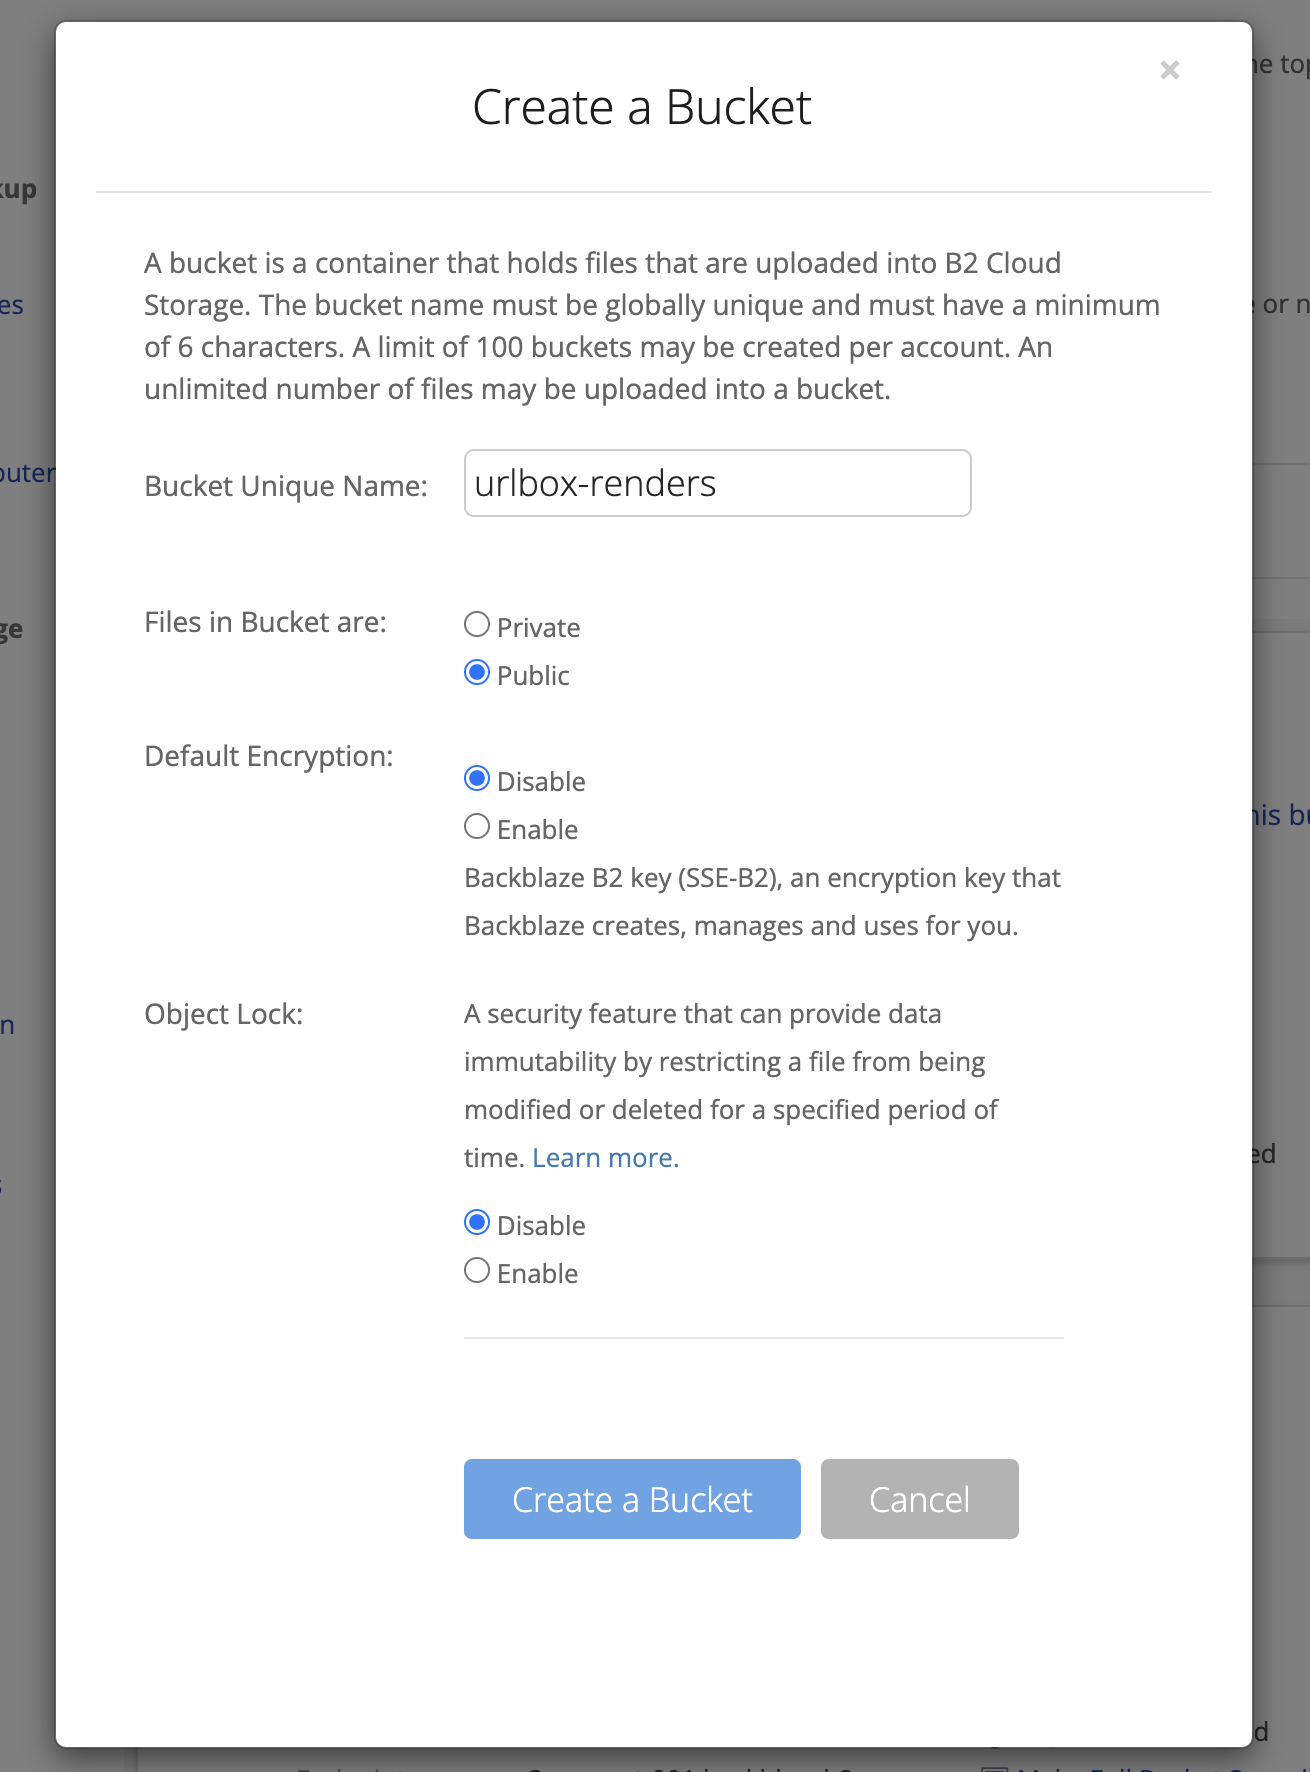
Log in to your Backblaze account and head to the B2 Cloud Storage section from the sidebar. Click into Buckets and then hit the Create a Bucket button and fill out the form.
For this guide we'll call the bucket urlbox-renders and make the files in it public.
Now click the Create Bucket button to create the bucket.
Create an Application Key to allow write access to the bucket
Once the bucket has been created, we need to create an application key which Urlbox can use in order to upload your renders to the bucket.
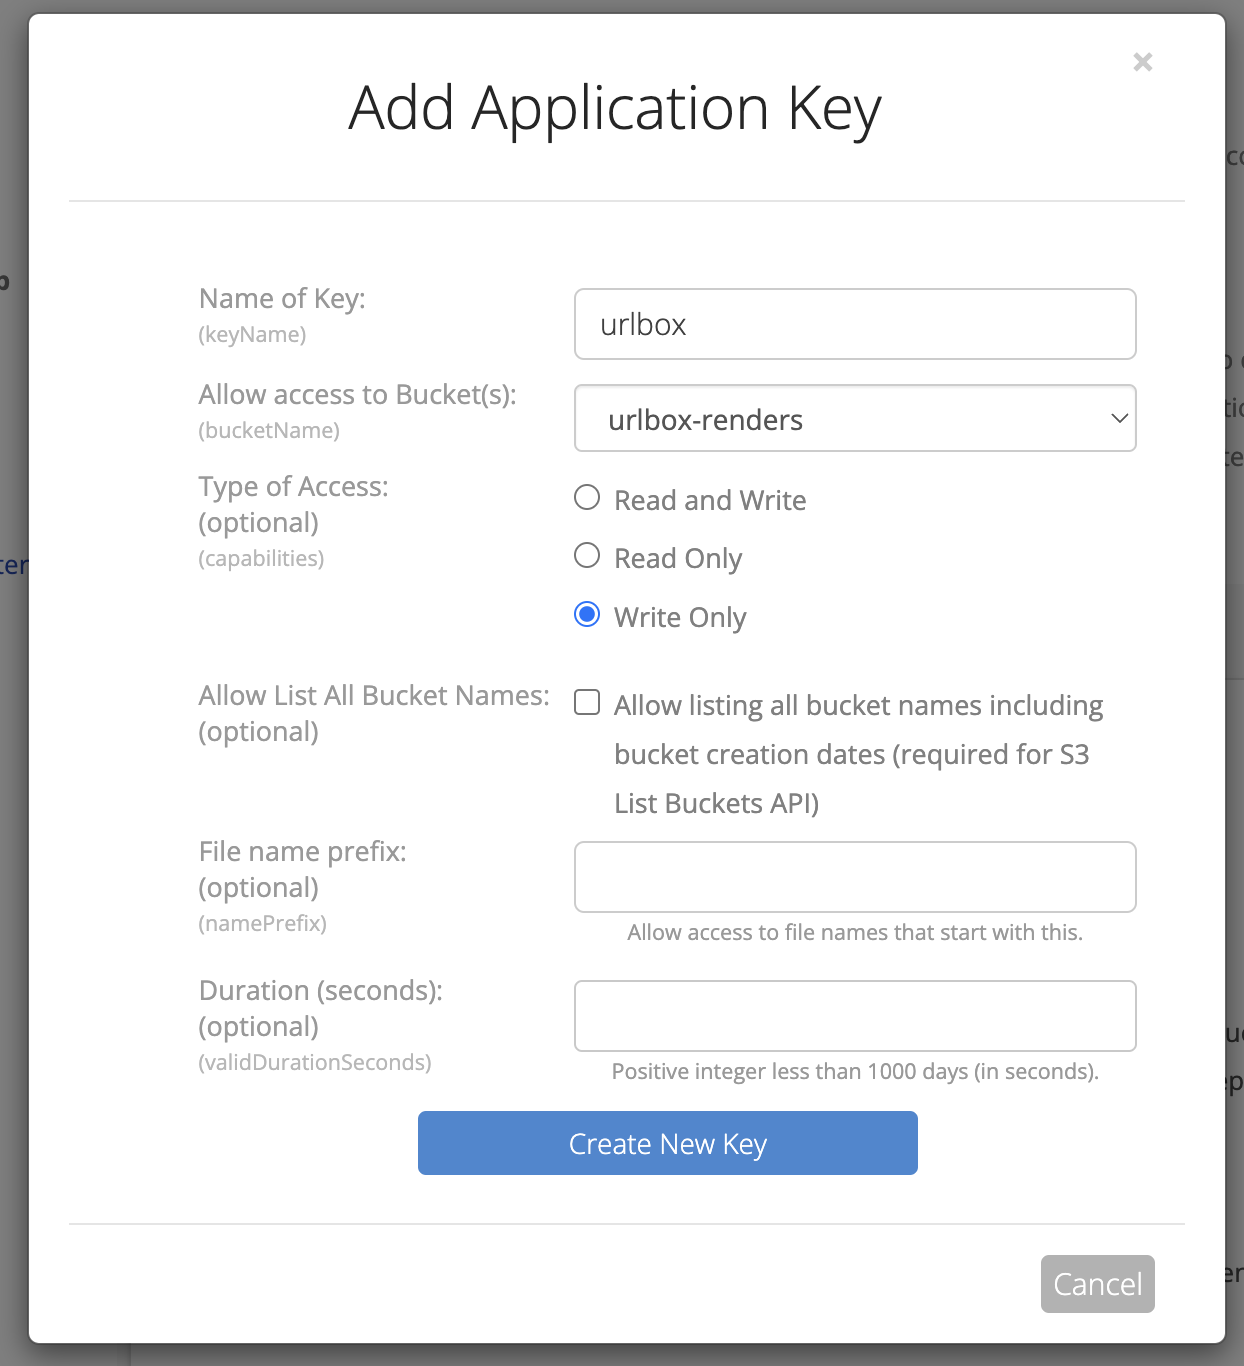
In the Account section, click into Application Keys and then click the Add a New Application Key button.
Give your key a name, something like urlbox should do.
You can choose to allow access to all buckets or select a specific bucket. For this guide we'll lock-down access to just the urlbox-renders bucket that we just created.
You can choose Write Only for the type of access to grant, as Urlbox only needs to be able to upload files to the bucket. The fact that the bucket is public means Urlbox will be able to serve the renders direct from the bucket.
Then click the Create New Key button to create the key.
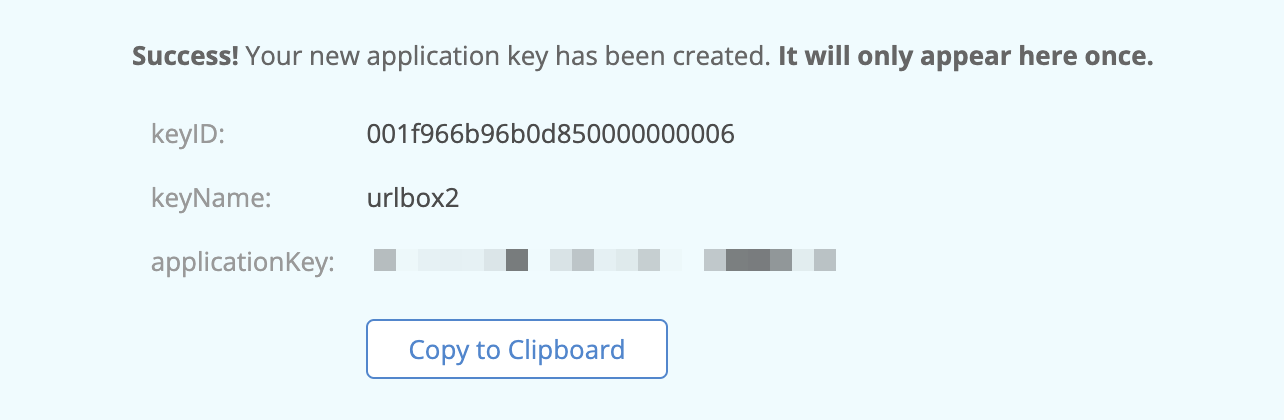
Once the application key is created, the backblaze will display your credentials temporarily.
The keyId is the access key and the applicationKey will be the secret key that we feed to Urlbox in the next step, so make sure to copy them somewhere safe.
Add Backblaze B2 credentials to Urlbox
Now we can go back to the Urlbox dashboard.
From within the project settings page, scroll down to the S3 Configuration section and click the Add S3 Config button.
Use the following settings:
-
Access Key The
keyIdvalue from the application key -
Secret The
applicationKeyvalue from the application key -
Bucket Name The name of the bucket you created earlier
-
Private Bucket Because this bucket is public, leave this option unchecked
-
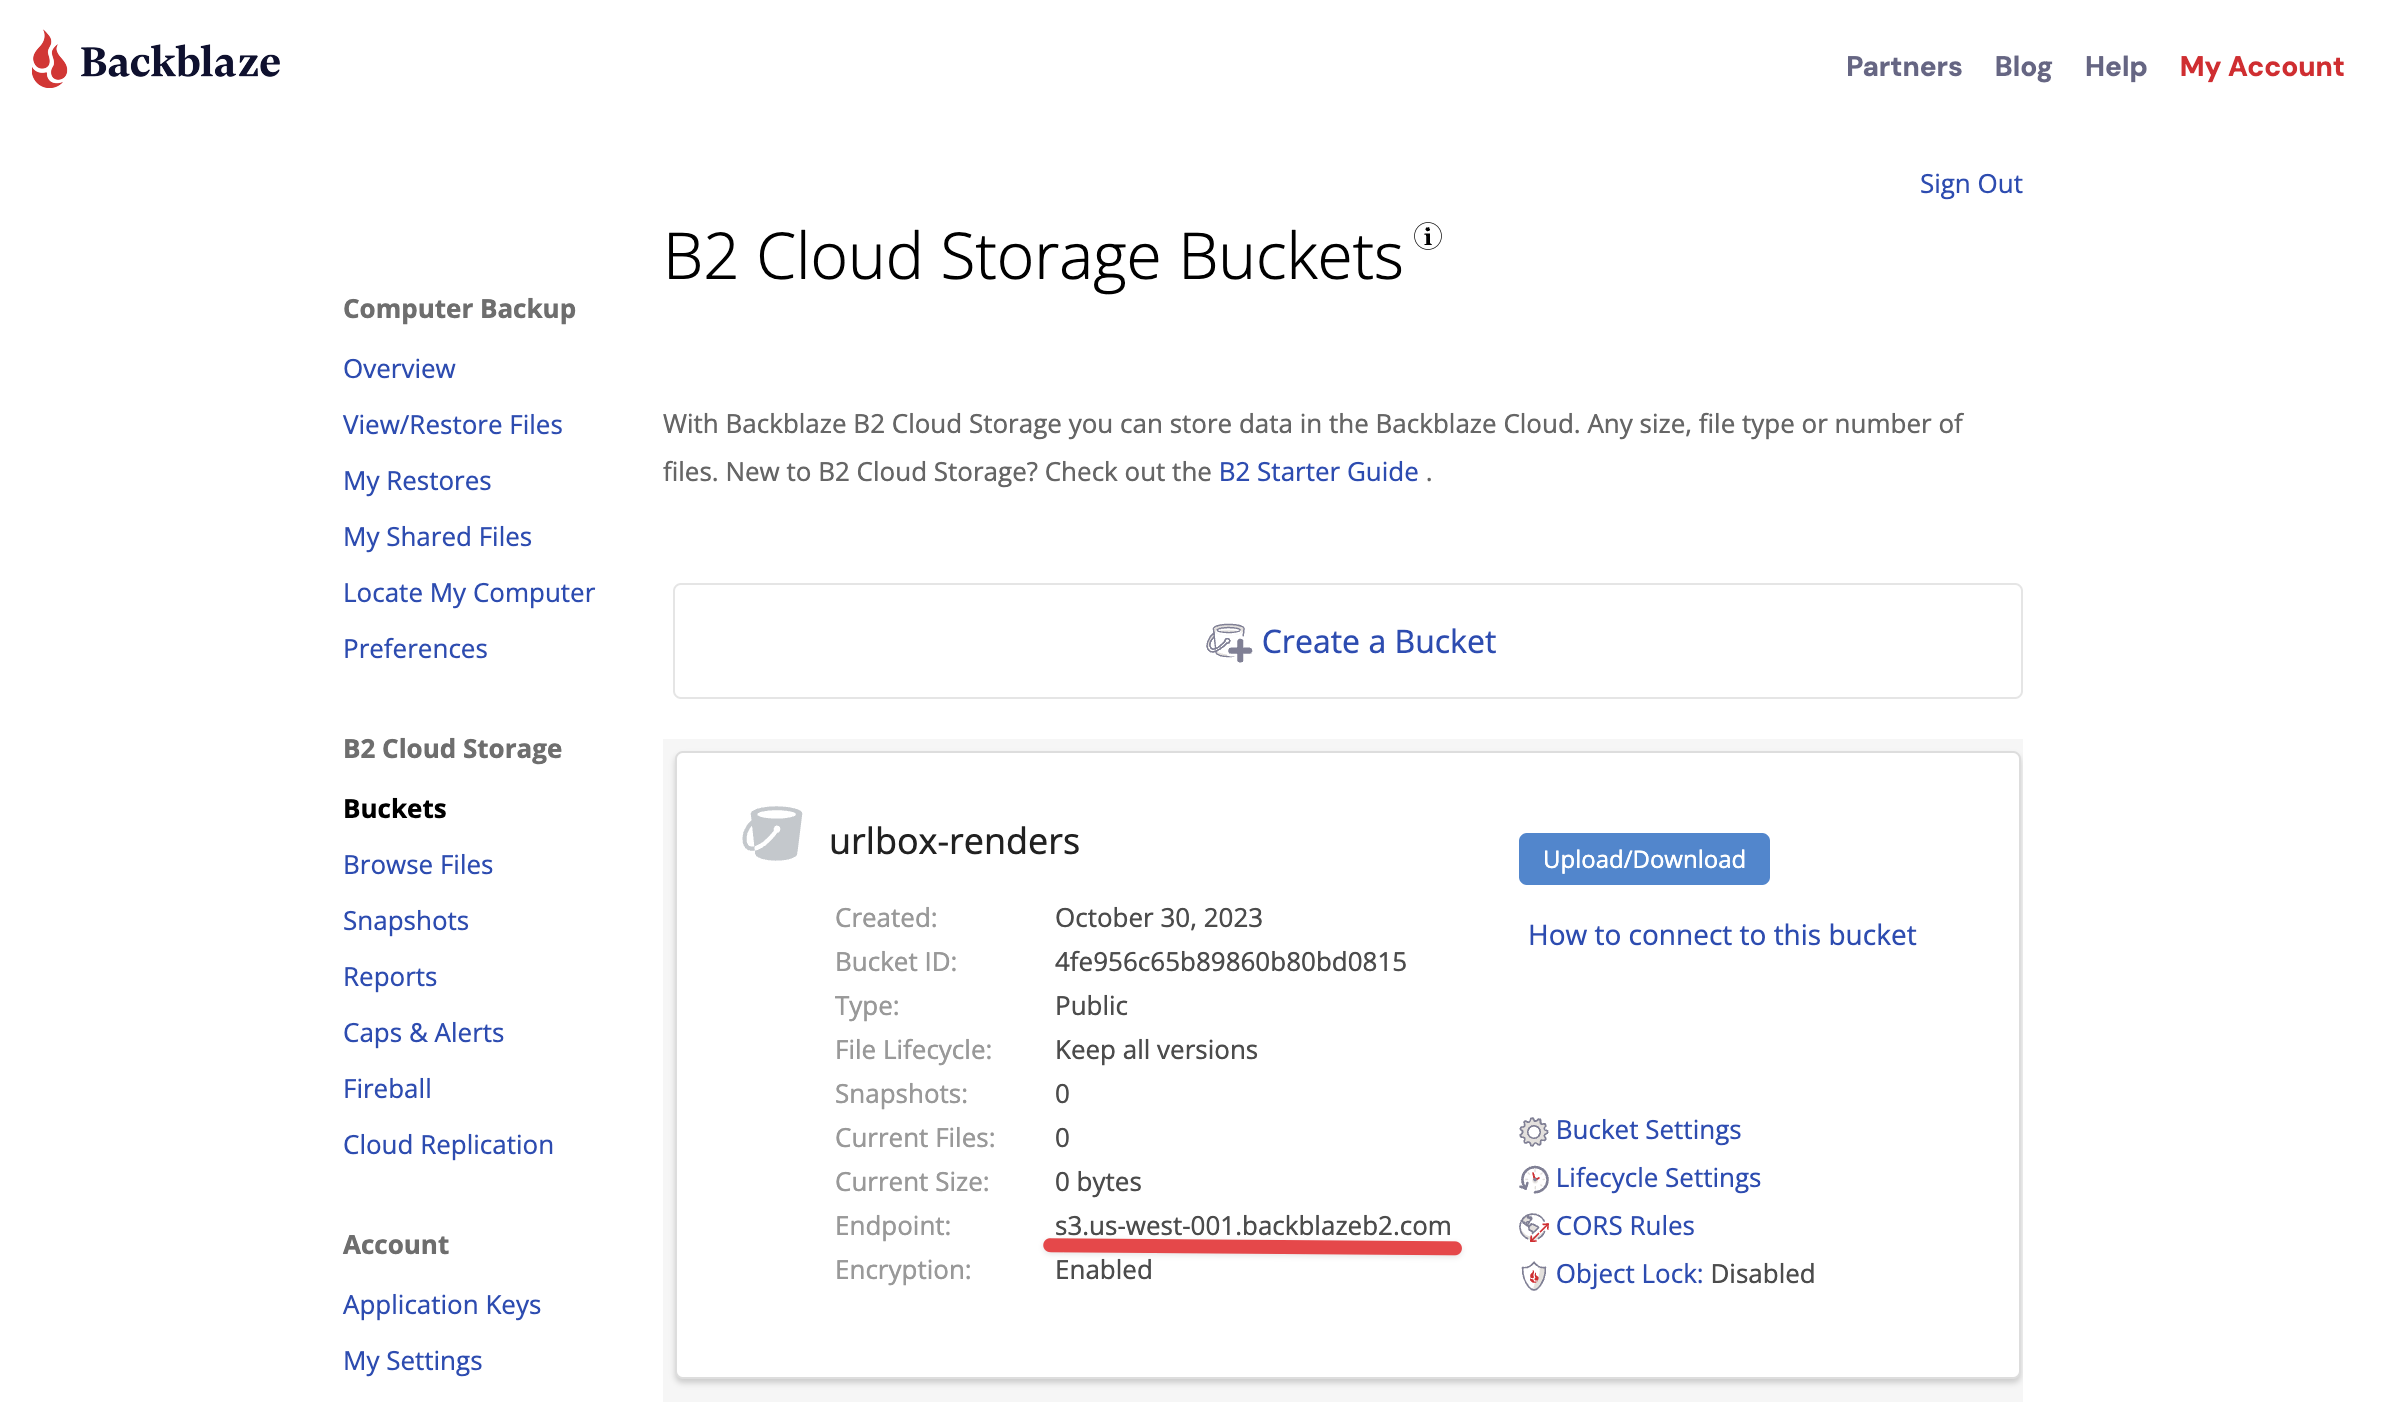
Endpoint URL For the endpoint URL we can go to our bucket page and see what endpoint we have been assigned:
It should look something like
s3.us-west-001.backblazeb2.combut might be different for your bucket.Make sure to add
https://to the start of the endpoint URL when adding it to Urlbox. -
Region Set to the middle part of the endpoint URL, so for the example above it would be
us-west-001.
The final s3 config should look like this once it has been filled out correctly:
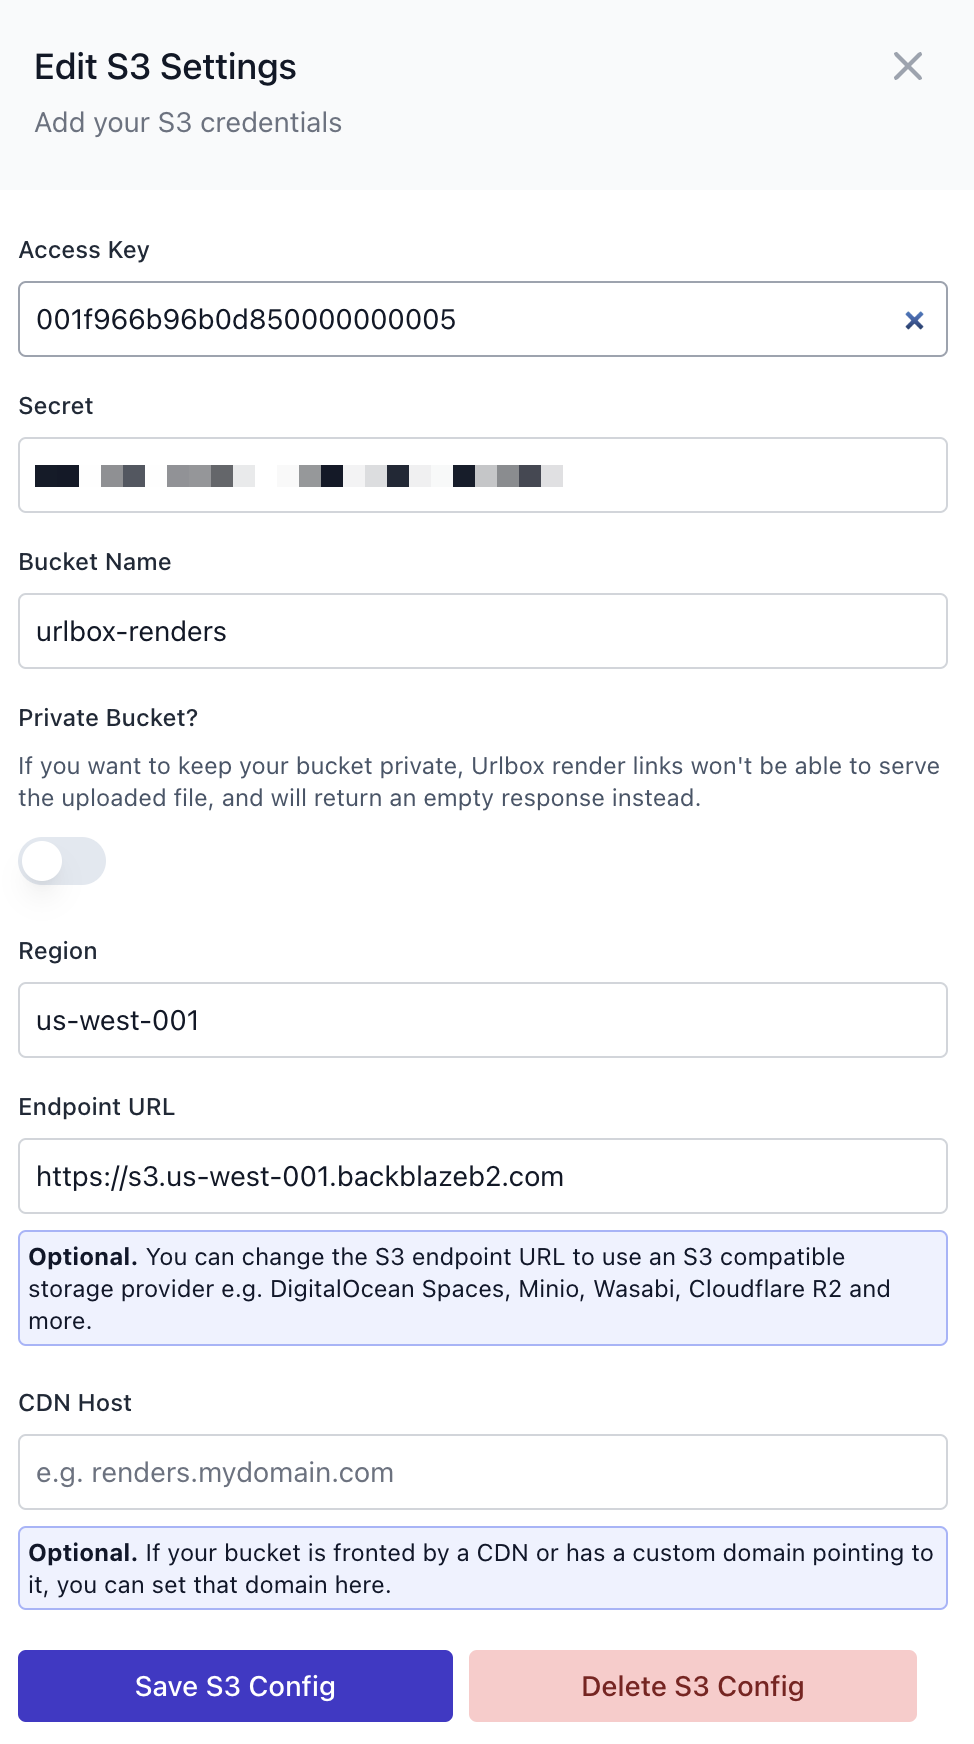
Then click Save S3 Config, and if everything is configured correctly, the form should disappear and you should see a success message.
When you click Save S3 Config on the form, Urlbox will attempt to upload a file to your bucket at urlbox_test/deleteme.txt to ensure that the credentials given allow write access to the bucket.
Using a private B2 Backblaze bucket
In order to use a private B2 bucket, change your bucket settings in B2 to make the files in the bucket private.
Then in your Urlbox S3 settings, check the Private Bucket option, which was previously left unchecked.
Now when you save a render to your bucket with Urlbox, the file will be private and will not be accessible to the public.
If using render links with a private bucket, Urlbox will now return a JSON response with a link to your private render, rather than attempt to serve the image.
Start saving screenshots to your B2 bucket
Now that your Backblaze B2 bucket is configured correctly, you can start saving screenshots to it.
You can do this by setting the use_s3 option to true in your API request. You can use s3_path to specify the path in your bucket to save the screenshot to.
For more options related to how renders are saved to your B2 bucket, please see the saving to s3 compatible storage guide.
